

The Cottage Exterior Renovation Part 1
Nov 15, 2025
When I purchased my 1947 cottage in February of 2025, we knew that there was rot around some of the windows and that the siding on the 1990’s addition was compromised.
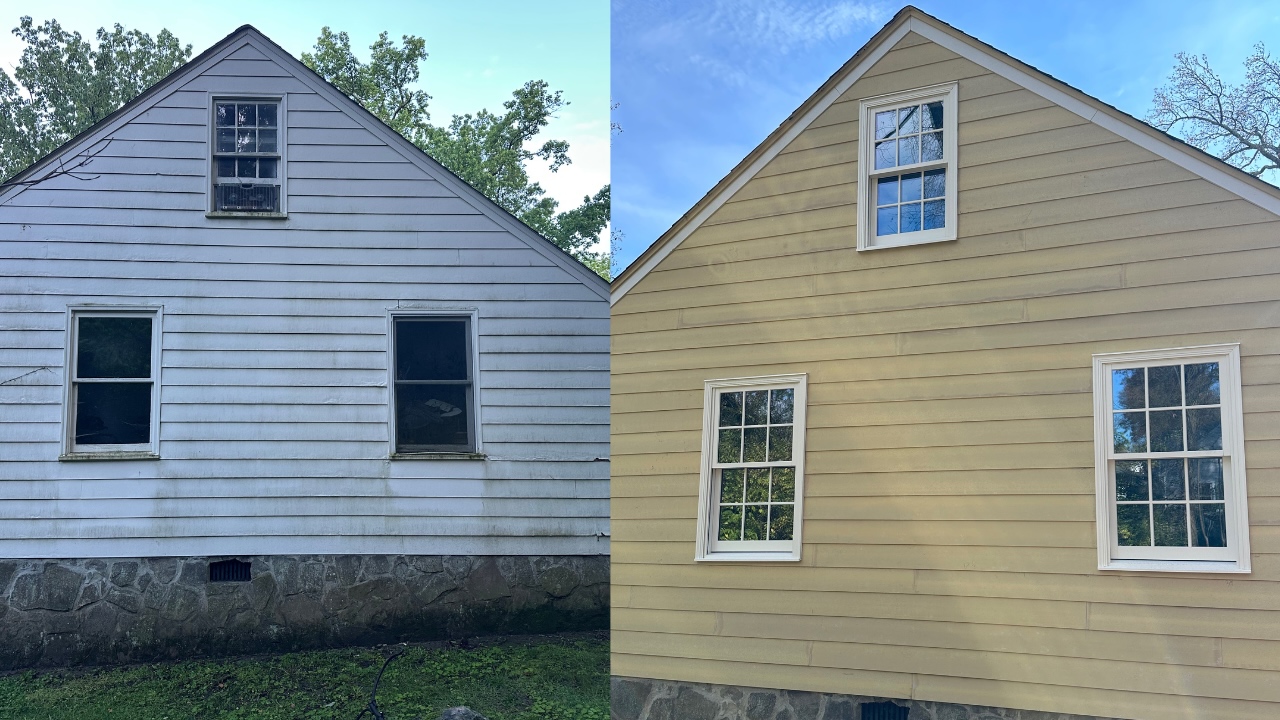
The 1947 part of the house had wood siding that had been painted many times over the years and wood windows, deteriorating and painted shut. Underneath the old siding was tar paper and full width wood boards, some with bark on the uneven edges - very solid.. The 1990’s addition had a masonite siding that is basically cardboard - so dumb. This siding had no vapor barrier underneath it so the plywood behind it was rotten in places. The windows on the addition were wood but they had rotted faster in 30 years than the 80 year old wood had.
I was encouraged to do what homeowners of this house had done over the years - just patch and replace the places that were obviously bad. My intuition told me to just do it all and I’m so happy I did because places that looked fine were anything but fine underneath. Here are a few problem areas I would never have known about if I hadn’t pulled all the siding off.
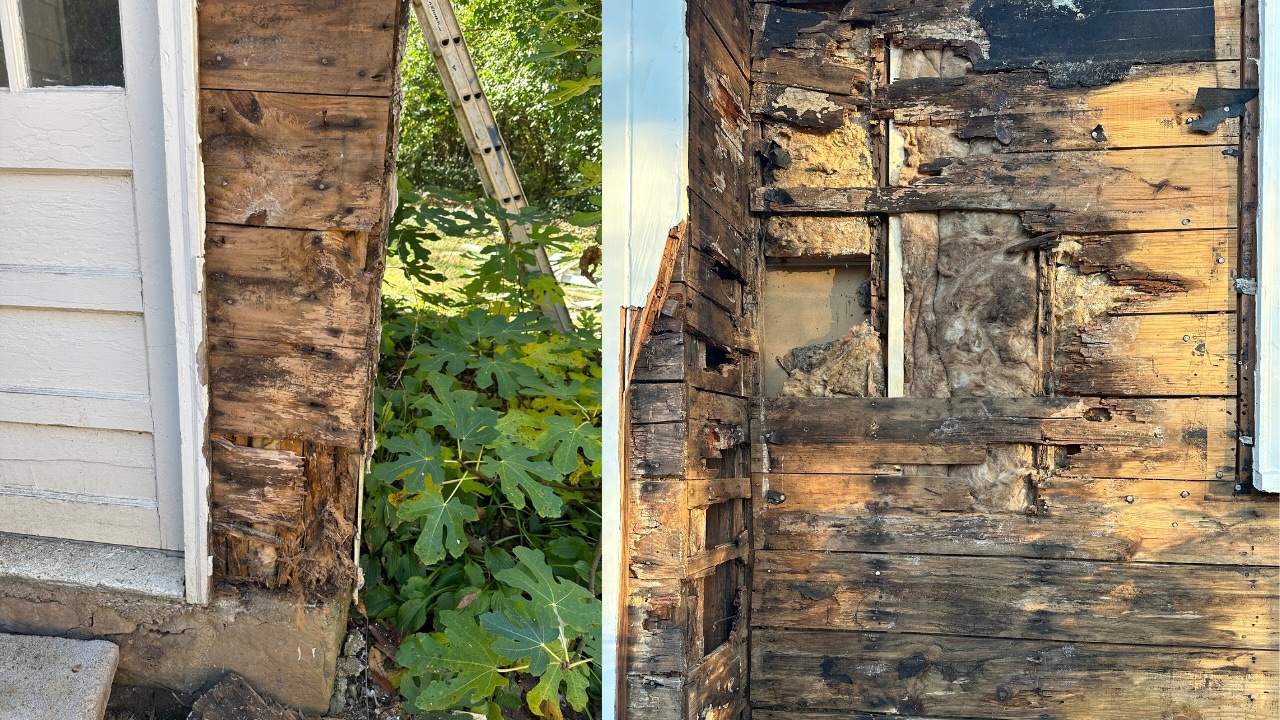
Most of this damage happened because gutters weren’t working properly over the years.
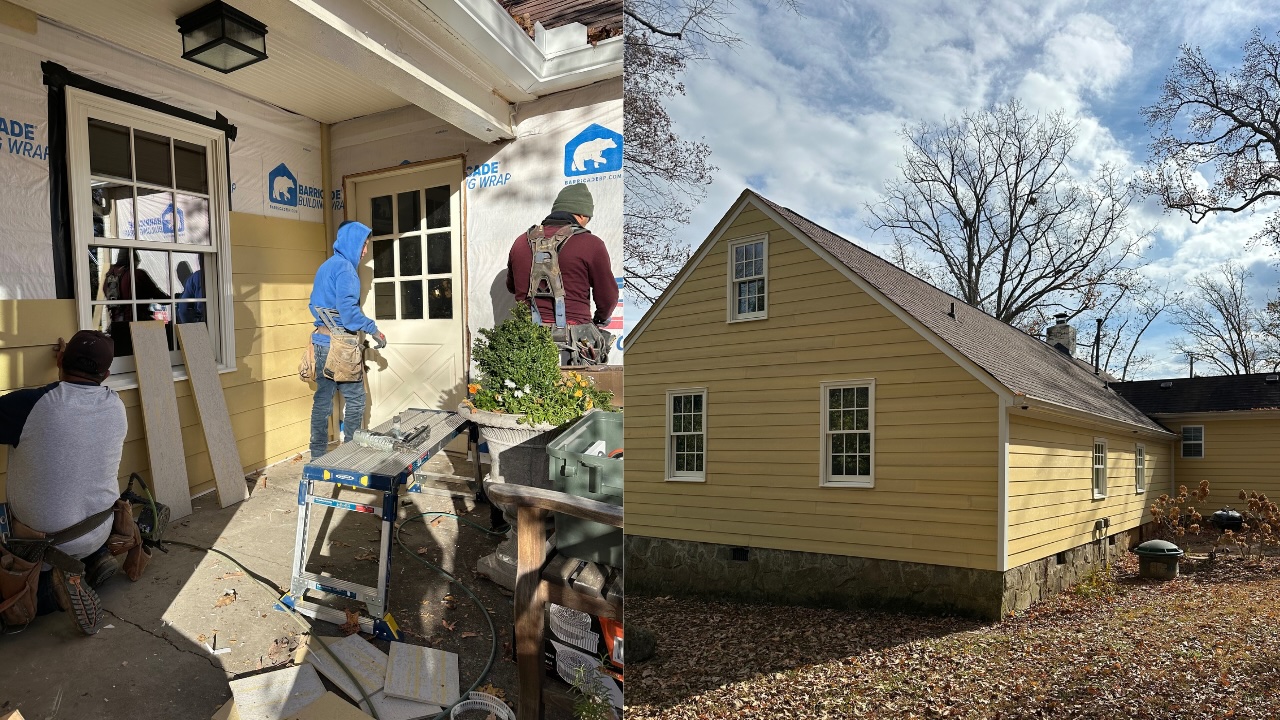
The amazing guys from Ideal Siding repaired it all beautifully, covered it with vapor barrier and Hardie siding. We’ll do the door another time.
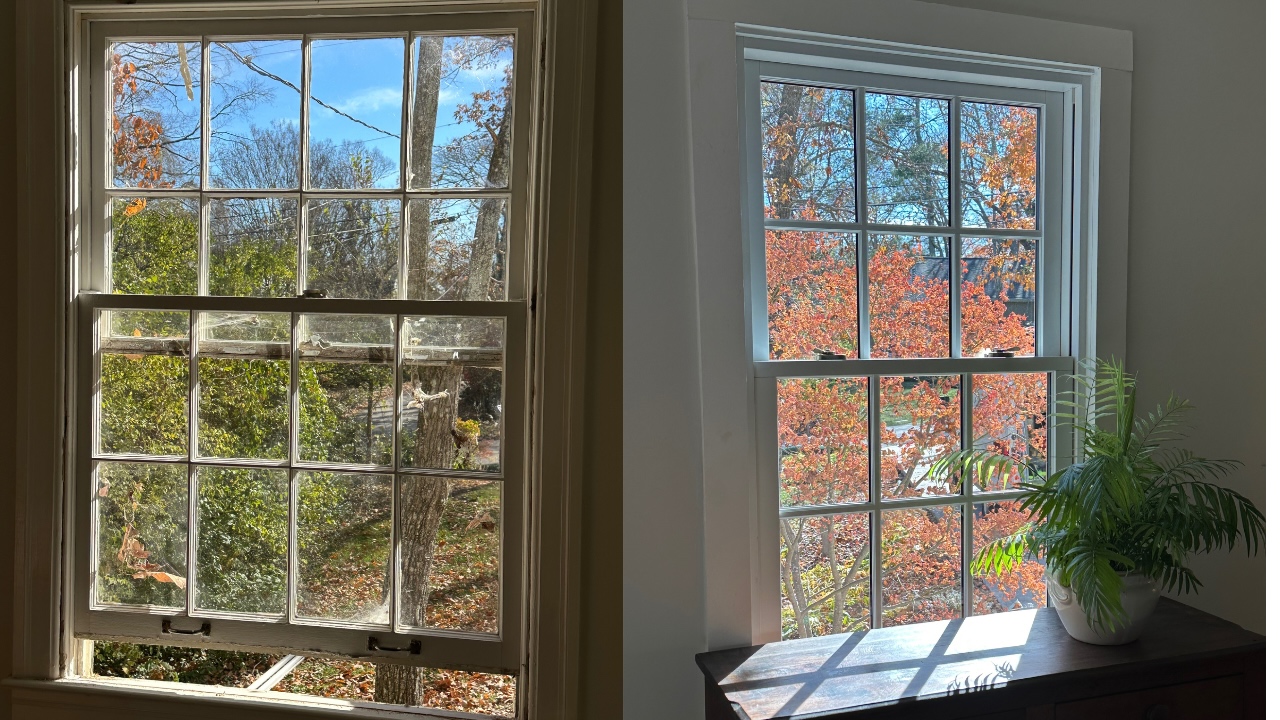
Now, let me tell you about the windows!! After researching and talking with several companies over 6 months, I ended up going with Home Choice Windows and Doors. They carry quality brands and I chose Sierra Pacific - a brand my parents had used in 2 homes over the past 25 years. They are wood on the inside and aluminum clad on the outside with grids that show because they are not just inside the glass (like some vinyl brands). They are on the outside and inside. They look so authentic to the cottage but unlike the old windows, they have insulated glass and tilt out for easy cleaning.
I wanted to replicate the double-hung divided light of the original but chose to calm down a few of them visually by choosing fewer panes of glass; 6 over 6 instead of the busy 8 over 8 of the old ones.
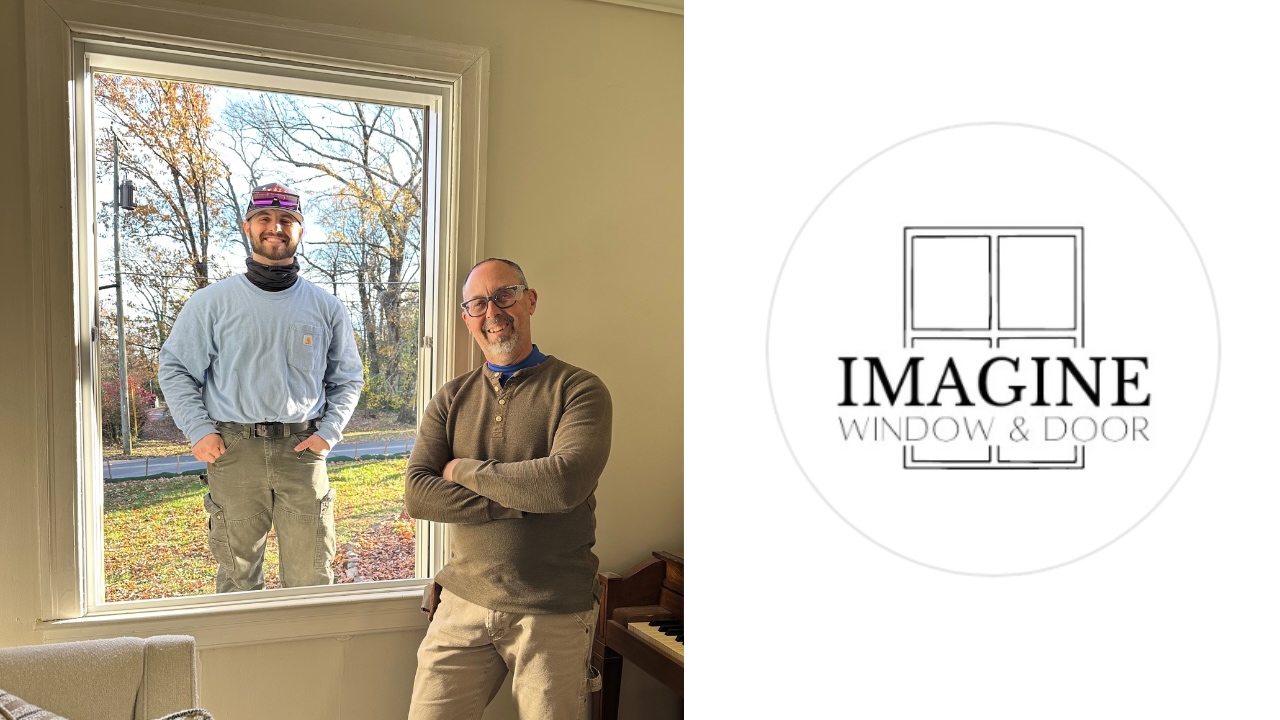
Let me tell you about my window installers. Imagine Windows is a father-son team who are experts at what they do. Every other installer and company I spoke with told me they would have to take off all the interior trim around the windows to install the new ones. They would try not to break the old original trim but might have to replace it. This sounded costly and sad to me - I wanted to preserve the original trim - most of which is not available anymore.
Imagine Windows installs without needing to remove the interior trim. They work closely with Home Choice and collaborate to measure each window precisely. They were able to adjust for the bigger sill depth in the old part of the house compared to the more modern depth in the back. It takes real experience and care to notice these details and the finished work shows it!
Now that windows are in, Ideal Siding is adding trim and rebuilding my carriage door style garage doors. Painting will happen the week of Thanksgiving. In the meantime, here's the difference so far - on the outside...
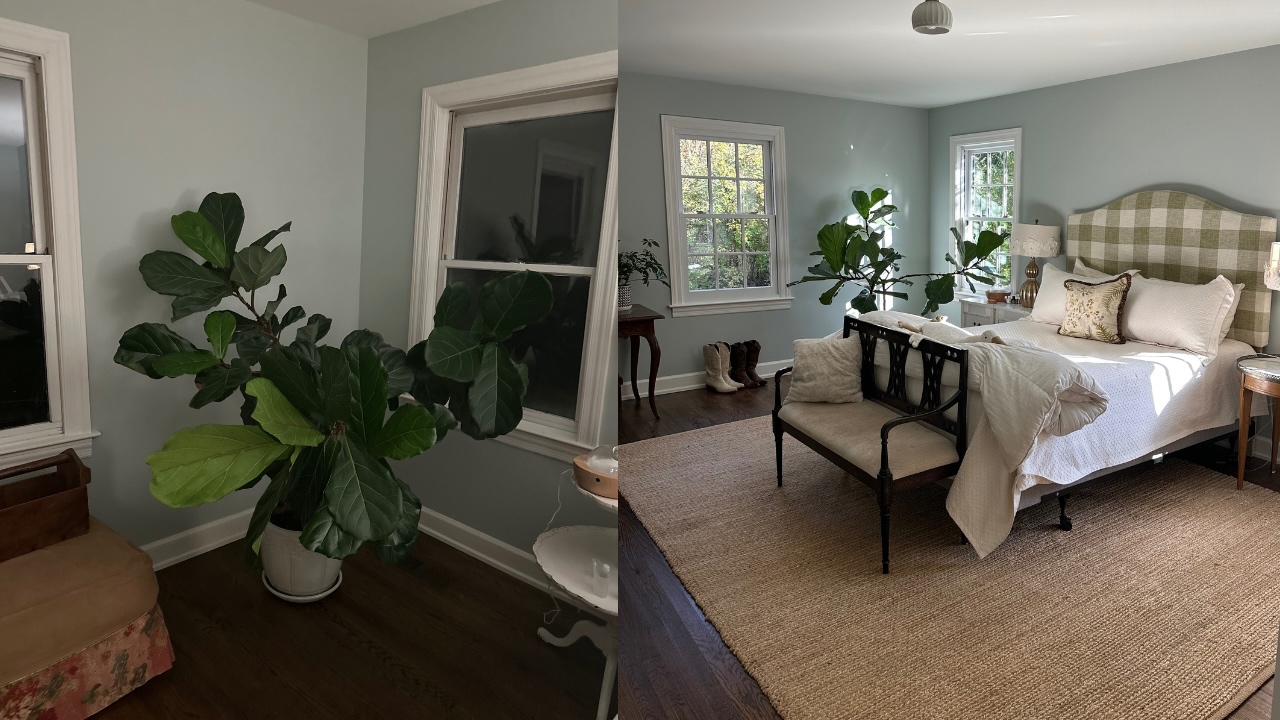
and on the inside - the new 6 over 6 paned windows make the master bedroom addition as charming now as the original cottage.
Look for Part 2, coming soon - the new garage carriage door, pressure washed stone and paint!
Stay connected...
weekly inspiration & encouragement for creating a home and life you love
