

Freshening up Our Schoolroom / Studio/ Office
Nov 11, 2019
Have you ever looked back on a particularly disruptive, stressful time in your life and realized that it actually brought some needed progress because of the energy it required of you? When I look back at the most trying times in my life, I often see accomplishments - bright spots in the midst of the mess. I didn’t want the disruption or emotional turmoil but it gave me the adrenaline and determination to make the best of it which yielded some beautiful results.

In late August/ early September the plans I had carefully made over many months all suddenly changed. I disappointed people, gave up some beloved projects and goals, and, determined to keep what I could of my old goals, I overloaded my schedule with way too much work which made it difficult to do anything well. The craziest part of that change was that for a whole week I lived in the limbo of cancelling one set of plans while the new plan was not in writing. I had been offered a full time job as a teacher with a charter school but that offer was not yet in writing. Taking that job meant that all the classes I had planned to teach as a vendor had to be cancelled. Not wanting to start classes that I couldn’t continue, I cancelled every one of them before I was sure of my new income. For all of Labor Day weekend, I lived in limbo and I HAD to do something with that adrenaline - so I took on the most daunting painting project I’d ever tackled: I painted our schoolroom/ den/ office/ studio space. I documented the process in my stories on Instagram (it’s in the highlights under “The Den”) but I’m sharing all the details here so, if you have a daunting project, you can get some ideas and learn from my experience.
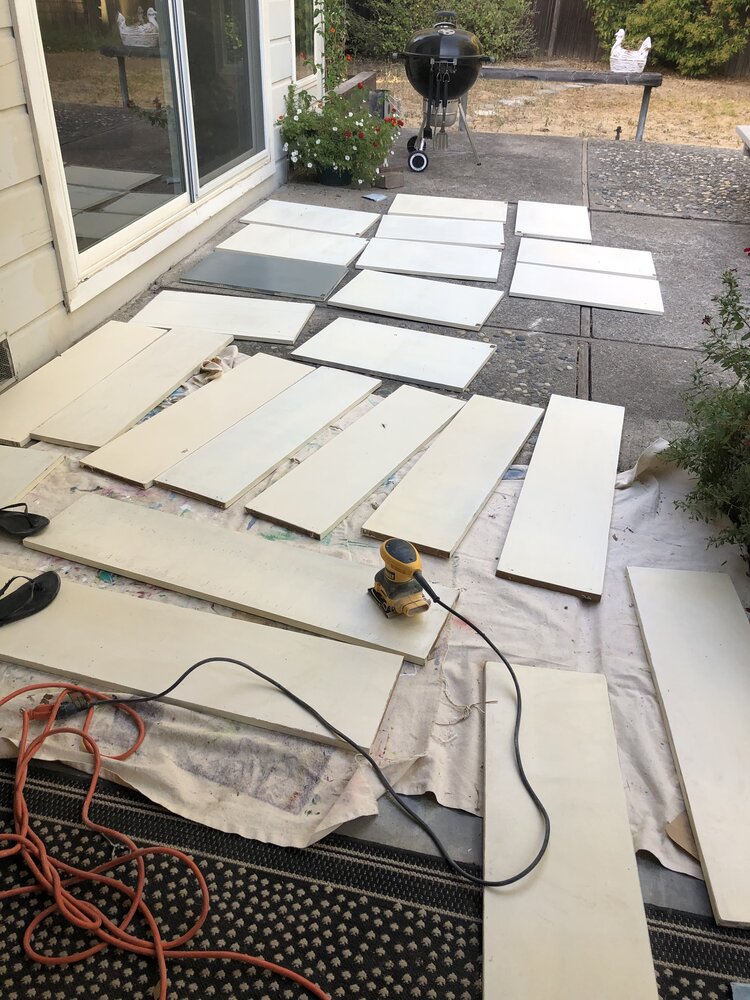
What made this project big was that the room has wood paneling and two walls of built in shelves/cabinets so the surfaces required some special treatment. I’m a color strategist and work part time at our local Benjamin Moore store so I knew exactly what color I wanted and had experts at my fingertips to advise me about the best products to use, but it was still a ton of work and a big learning experience. Here’s how it all unfolded…


I used Insl-x primer - it washes up with water and preps almost any surface. It was perfect for the dingy yellow/cream shelves and walls in our den which had an oil-based, glossy paint on them that regular paint would not adhere to. Once primed, we painted the walls and doors Benjamin Moore’s OC-117 Simply White - a crisp but warm white - latex eggshell on the brick and walls and Cabinet Coat on the doors and cabinets. Then the built-in shelves prep began.
On the advice of one of the paint experts at Benjamin Moore, I took a different approach to the cabinets. Instead of priming, I sanded the sheen off the cabinets and then used Cabinet Coat paint. Cabinet Coat is self-priming and it dries with a harder finish than regular latex wall paint - perfect for high use areas like cabinets, doors and trim.. I kind of wish I had primed too but it turned out fine anyway. Here’s what I did…


3) Hardware - if you don’t like what you have, consider painting it. With 16 cabinets, buying new hardware would have been an investment. Ours was dated - kind of a pinkish bronze - so it needed a new finish. I chose antique brass from Rust-oleum and it worked beautifully.


Wipe the metal with mineral spirits first. Use a primer first, then the color you want. Your local hardware store should have a wide selection. The cap is the color you’ll get.


Lay it out on a drop cloth outside and spray - following the directions on the can. I used a big piece of styrofoam to hold the screws and I put the pulls on nails pushed into the styrofoam. I painted the outlet covers to match the bookshelves. The antique brass looks great with the blue/green/gray Night Train.
Isn’t it amazing what paint can do?? If you’d like some help choosing paint colors for your home, book a color consultation with me! It’s my favorite thing to do!


It took me forever to decide how to arrange all our homeschool curriculum. A few Cavalini papers and Perennials fabric swatches set the stage for my color work and the kids’ art projects. The office side of the room is anchored by a vintage desk.
In addition to the job change, my daughter had emergency surgery while away at college and I flew to be with her at the last minute, I had jury duty for two weeks, and had to cancel a long-planned trip. All in September - LOL!! So here’s to using the difficult experiences of life to move us forward in other areas. I can look back now at crazy September and smile. It felt overwhelming but I learned that I could stand in the midst of chaos and just take one day at a time but also that, if I channel that stress in productive ways, I can create lasting improvements to our home and life. What do you do when life becomes overwhelming? Do you take on crazy projects like me? How do you get through it?
Stay connected...
weekly inspiration & encouragement for creating a home and life you love
